Creating a Project with Wizard
If you run SESMailer for the first time or simply want to start a new project, click on File -> New project wizard in order to start an Email Campaign Wizard that will guide you through the setup process in three easy steps.

On the first step you should enter Amazon SES credentials. If you don't have an account with Amazon yet then click on the link in the wizard. Create an account then go back to SESMailer and fill in the keys.
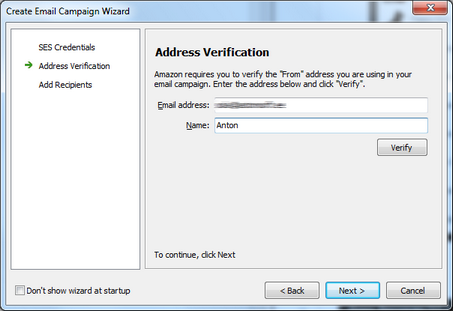
On the second step you should fill a name and an email which will be used as a sender. Entered email address should be verified before getting to the next step. Press Verify button, this will send a message with confirmation link. Check your mail for the message from Amazon with "Amazon SES Address Verification Request" subject and click on the link in it. Then go back to wizard and press on the Next button.

On the third step you can add the list of recipients from CSV file (this can be done later when working with project). Drag file from Windows explorer to the shaded area or locate CSV file by pressing Browse button. Once recipients are imported press Finish button.
Creating a Project Manually
To create a project without a wizard click on File -> New Project. Then you should do the same things as wizard does but using main menu commands. Fill in credentials under Tools -> Edit credentials then verify a sender email address under Action -> Verify sender menu. Then you can start with composing an email.
Saving a Project
All project data such as email, recipients list and credentials can be saved in one project file (*.ssp). To save a project click on File -> Save project, then enter a project name and set location for project file.
Opening an Existing Project
To open an existing project click on File -> Open project then locate project file (*.ssp) in browser window and press OK.